How to use GORM packages in Golang

How to use GORM package with SQLite database in Golang


Golang is a programming language developed by Google. It can used to create cloud services, web , CLI tools etc. The first step to use Go is download and install the SDK.

GORM

GORM is a ORM in Golang which help to generate and manipulate databases such as MySql, SQL server, SQLite etc. It will automatically create table for storing data based on ORM models.

In this example we are going to setup a SQLite database.

To make use of GORM first we need to add two packages

  • GORM
  • SQLITE drive

While using SQLite driver in Window there can be an gcc compiler error, please refer post link down below this post.

Let’s add the packages

 go get gorm.io/driver/sqlite
 gorm.io/driver/sqlite

Initialize and Migrate database with the ORM

First up all we need to generate a Model/Schema for our table and then initialize the database.

  type Product struct {
	gorm.Model
	Code  string
	Price uint
  }

With Automigrate GORM will make necessary changes in the database structure, only if there is a change occurs in the Schema.

	db, err := gorm.Open(sqlite.Open("test.db"), &gorm.Config{})
	if err != nil {
	  panic("failed to connect database")
	}
	 // Migrate the schema
  db.AutoMigrate(&Product{})

The complete code for setup GORM is following.

Complete code
//main.go
package main

import (
	"fmt"
	"gorm.io/driver/sqlite"
	"gorm.io/gorm"
)

  type Product struct {
	gorm.Model
	Code  string
	Price uint
  }

  func main() {
	db, err := gorm.Open(sqlite.Open("test.db"), &gorm.Config{})
	if err != nil {
	  panic("failed to connect database")
	}

	 // Migrate the schema
  db.AutoMigrate(&Product{})
   // Create
  db.Create(&Product{Code: "D42", Price: 100})

   // Read
   var product Product
   db.First(&product, 1) // find product with integer primary key
   fmt.Println(product.Price)
    db.First(&product, "code = ?", "D42") // find product with code D42
 
  Update - update product's price to 200
    db.Model(&product).Update("Price", 200)
 db.Model(&product).Updates(Product{Price: 200, Code: "F42"}) // non-zero fields
 db.Model(&product).Updates(map[string]interface{}{"Price": 200, "Code": "F42"})
 Delete - delete product
 db.Delete(&product, 1)
  }

How to insert Rows in .Net using Dapper ORM

How to use dapper ORM to insert rows in a .Net project.


Dapper is a micro ORM which make database operation simple using Models. It has capability to handle all type of databases.

How to use latest dapper ORM version with .Net project ?

Dapper require .Net Framework 4.7.2 or latter. Make sure the visual studio project support the Dapper or you can change the target Frame Work.

Open the Nuget manager and browse dapper and install the dapper and associated contrib extension.

Inserting Rows using Model

We can use dapper by importing the Dapper library as follows in module.

using Dapper;
 

To insert we have to prepare the Model and use IDbConnection to invoke the insert command. Again we have two choice a single row or list of row using a list objects.

 using (SqlConnection con = connection._GetConnection())
                    {
                        long rec = con.Insert(Salary);
                        
                        con.Close();
                     
                    }

Here _GetConnection() is a function that return a IDbConnection object and Salary is a regular C# class with table columns and getters and setters.

//Salary 
class Salary{
public int id {get;set;}
public double slary {get;set;}
}

How to use dapper in .Net project

How to use dapper ORM in .Net projects


Dapper is a micro ORM which make database operation simple using Models. It has capability to handle all type of databases.

The real charm of dapper is when you are working ModelView pattern., l leave that topic for another post.

How to use latest dapper ORM version with .Net project ?

Dapper require .Net Framework 4.7.2 or latter. Make sure the visual studio project support the Dapper or you can change the target Frame Work.

Open the Nuget manager and browse dapper and install the dapper and associated contrib extension.

Usage

We can use dapper by importing the Dapper library as follows

using Dapper;
....
var sql ="select * from emp order by id";
using (SqlConnection con = <sql connection>)
{
  con.QueryFirst<Models.Employee>(sql);
                        
}

The above example is based on C#.Net. This will return a list of Employee objects, which will be very useful for binding to a datagridview or a Combo control.

Create API with Prisma + Express + Server Middle Ware in Nuxt

Create a API using serverMiddleware , Prisma and Express in Nuxtjs


Setup Prisma ORM for Nuxtjs project

An API requires special server middleware in nuxt, also we need to create a custom route, express framework will help us manage the route, Prisma ORM, a minimal configurable mapper for managing database.

Prisma is a ORM for JavaScript and Typescript, it let developers easily configure, create / migrate databases using models. One of the cool feature I love mostly is that , it can be configured with few CLI commands like init, migrate

View and Run the code @ sandbox

Setup Prisma

For initializing the Prisma install the developer dependency npm i -d prisma and initialize prisma with

npx prisma init

It will generate necessary files under Prisma folder, please open the file and configure database and models. For demonstration I have configured a Sqlite database, you can use other databases like mysql, postgres, Mongodb etc.

//schema.prisma

datasource db {
 provider = "sqlite"
 url      = "file:./dev.db"
}

generator client {
 provider = "prisma-client-js"
}

model Contact{
 id String @id @default(uuid())
 name String
 email String
}
 

Note the id field in the model, it is a primary key and also auto filled by the uuid() function. One you done models go to generate the real database with migrate command

npx prisam migrate dev --name init

This will generate the tables using the models we defined, to make sure we can use the prisma studio which runs on the port 555, also a standalone studio app is available.

In the future we can modify and rerun the migrate command for updating the tables, which will drop the tables and re-create for us.

// run in new terminal
npmx prisma studio

How to use in our Nuxtjs app

In the nuxtjs app we need the dependency @prisma/client, let’s add them to our project

nmp i -s @prisma/client

In the Nuxt app , we can setup internal API for interacting with database using server middleware.

API routes

In the project folder create a folder api and inside the folder create a file index.ts

For create routes, we can use the express framework the API should export the handler as in Nextjs.

index.ts
import express from "express";
import { PrismaClient, Todo } from "@prisma/client";
const app = express();
const prisma = new PrismaClient();
app.use(express.json());

app.get("/", (req, res) => {
 res.json("Wlcome to API");
});

app.get("/todos", async (req, res) => {
 const todos = await prisma.todo.findMany();
 res.json(todos);
});

export default {
 path: "/api",
 handler: app
};

Nuxt-config

For using Prisma client we need to use PrismaClient object. The API would not work at this point, it also required setup a middleware in the dedicated nuxt-config.

export default {
 // Disable server-side rendering: https://go.nuxtjs.dev/ssr-mode
 ssr: false,
 serverMiddleware:[
   '~/api/index.ts',
] ,  
   .....

and now the api can be accessed at http://localhost:3000/api

Setup Prisma ORM for Nextjs

How to setup Prsma ORM for React and Nextjs projects


Prisma is a ORM for JavaScript and Typescript, it let developers easily configure, create / migrate databases using models. One of the cool feature I love mostly is that , it can be configured with few CLI commands like init, migrate

Setup Prisma

For initializing the Prisma install the developer dependency npm i -d prisma and initialize prisma with

npx prisma init

It will generate necessary files under Prisma folder, please open the file and configure database and models. For demonstration I have configured a Sqlite database, you can use other databases like mysql, postgres, Mongodb etc.

//schema.prisma

datasource db {
 provider = "sqlite"
 url      = "file:./dev.db"
}

generator client {
 provider = "prisma-client-js"
}

model Contact{
 id String @id @default(uuid())
 name String
 email String
}
 

Note the id field in the model, it is a primary key and also auto filled by the uuid() function. One you done models go to generate the real database with migrate command

npx prisam migrate dev --name init

This will generate the tables using the models we defined, to make sure we can use the prisma studio which runs on the port 555, also a standalone studio app is available.

In the future we can modify and rerun the migrate command for updating the tables, which will drop the tables and re-create for us.

// run in new terminal
npmx prisma studio

How to use in our Nextjs app

In the nextjs app we need the dependency @prisma/client, let’s add them to our project

nmp i -s @prisma/client

In our React file we can now create prisma object and call the fetch method which will get the data from database. Usually we done the fetching with getStaticProps method in React.

//index.js

export async function getStaticProps() {
 const contacts = await prisma.contact.findMany();
 return {
   props: {
     initialContacts: contacts,
  },
};
}

export default function Home({initialContacts}) {
const [contacts, setcontacts] = useState(initialContacts);
....

In the similar way, we can use them in API or graphql end points too.

MariaDB connection using ORM in Deno

Deno example for using MySQL connector (denodb ORM) for MariaDB in a Deno app


Let’s move into another interesting sections, the database where we store information processed. In this post we are connecting MariaDB local database using ORM , denodb.

We can use the same MySQL connector for MariaDB with almost no change

Denodb-ORM

This is a third party ORM module for deno which will help us to MariaDB in Deno. The ORM module work through Model, so we can perform operations using Model, no worry about confusing, queries and statements.

APP

Our app is a simple Todo application, which store Todo’s in a MariaDB database.

  • create a configuration
  • Create Models
  • Link Model and Sync

Configuration

Usually we kept the database file under a config folder, the name of our file will database.ts and content s follows. In the final steps of the configuration we export the model.

import { Model, Database, MySQLConnector, DataTypes } from 'https://deno.land/x/denodb/mod.ts';
//config for MariaDB using MySQKConnector
const connector = new MySQLConnector({
  database: 'todo_collections',
  host: '127.0.0.1',
  username: 'root',
  password: '123',
  port: 3306, // optional
});


const db = new Database(connector)

// NOTE Models 
class Todo extends Model {
    static table = 'todos';
    static fields = {
        id: {
            type: DataTypes.INTEGER,
            autoIncrement: true,
            primaryKey: true,
        },
        item: {
            type: DataTypes.STRING,
        }
        ,
        description: {
            type: DataTypes.STRING,
        }
    };
}
// NOTE Linking Model with DB
db.link([Todo])
await db.sync()

 export default Todo;

You have to specify the host which is localhost, user and password, database name (you should create them first) and we are ready for the controllers.

Sync () – will create the tables for you. You have to create the database which in not created by the sync. Optionally you can use {drop:true} for deleting table every time, the app runs

SQLite app using denodb in Deno

How to create SQLite deno app with Denodb ORM, an opensource module for deno


Let’s move into another interesting sections, the database where we store information processed. In this post we are store data into local SQLite database/

Denodb-ORM

This is a third party ORM module for deno which will help us to connect MySQL, MariaDB, SQLite and Postgres databases. The ORM module work through Model, so we can perform operations using Model, no worry about confusing, queries and statements.

APP

Our app is a simple Todo application, which store Todo’s in a MySQL database.

  • create a configuration
  • Create a SQLite file
  • Create Models
  • Link Model and Sync

Configuration

Usually we kept the database file under a config folder, the name of our file will database.ts and content s follows. In the final steps of the configuration we export the model.

import { Model, Database, SQLite3Connector, DataTypes } from "../deps.ts";

const connector = new SQLite3Connector({
    filepath: './database.sqlite',
});

const db = new Database(connector)

// NOTE Models 
class Todo extends Model {
    static table = 'todos';
    static fields = {
        id: {
            type: DataTypes.INTEGER,
            primaryKey: true,
        },
        item: {
            type: DataTypes.STRING,
        }
        ,
        description: {
            type: DataTypes.STRING,
        }
    };
}
// NOTE Linking Model with DB
db.link([Todo])
await db.sync()

 export default Todo;

Sync () – will create the tables for you. You have to create the database which in not created by the sync.

MySQL connection using ORM in Deno

Example for MySQL connection using denodb ORM in Deno


Let’s move into another interesting sections, the database where we store information processed. In this post we are connecting MySQL local database using ORM , denodb.

Denodb-ORM

This is a third party ORM module for deno which will help us to connectMySQL db in Deno. The ORM module work through Model, so we can perform operations using Model, no worry about confusing, queries and statements.

APP

Our app is a simple Todo application, which store Todo’s in a MySQL database.

  • create a configuration
  • Create Models
  • Link Model and Sync

Configuration

Usually we kept the database file under a config folder, the name of our file will database.ts and content s follows. In the final steps of the configuration we export the model.

import { Model, Database, MySQLConnector, DataTypes } from 'https://deno.land/x/denodb/mod.ts';

const connector = new MySQLConnector({
  database: 'todo_collections',
  host: '127.0.0.1',
  username: 'root',
  password: '123',
  port: 3306, // optional
});


const db = new Database(connector)

// NOTE Models 
class Todo extends Model {
    static table = 'todos';
    static fields = {
        id: {
            type: DataTypes.INTEGER,
            autoIncrement: true,
            primaryKey: true,
        },
        item: {
            type: DataTypes.STRING,
        }
        ,
        description: {
            type: DataTypes.STRING,
        }
    };
}
// NOTE Linking Model with DB
db.link([Todo])
await db.sync()

 export default Todo;

You have to specify the host which is localhost, user and password, database name (you should create them first) and we are ready for the controllers. I use the default port for MySQL.

Sync () – will create the tables for you. You have to create the database which in not created by the sync. Optionally you can use {drop:true} for deleting table every time, the app runs

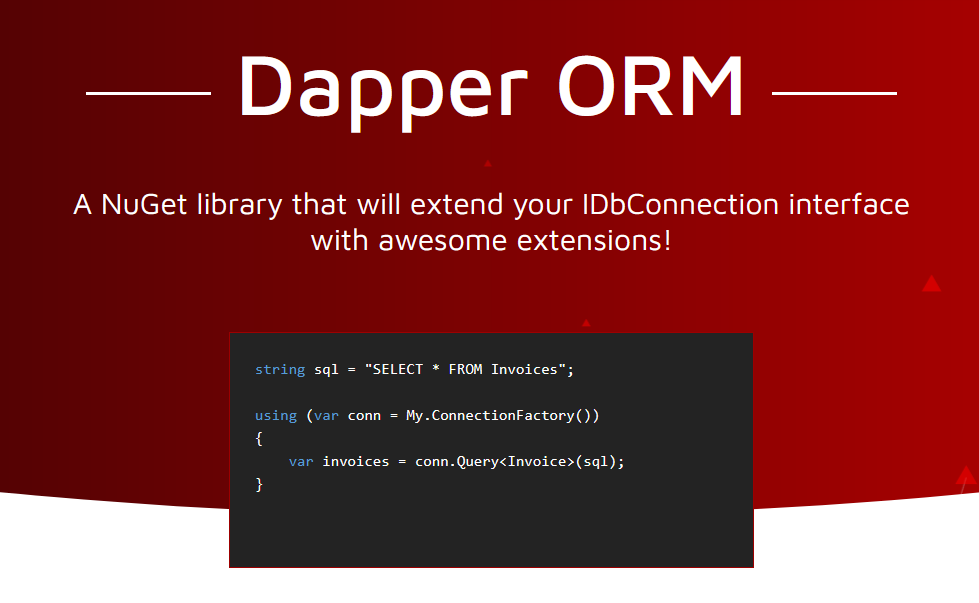
Dapper ORM for .Net

About Dapper micro ORM framework for .Net projects


Dapper is opensource micro ORM framework that will help you access data from database in .Net projects. The project is maintained by stackoverflow community and hosted on GitHub

Usually database query return table which contains rows of information. In the object based programming world require data as class/objects. ORM help us to convert row into an object. It can also perform all CURD operations too.

The ORM can be utilized in Model-View-Model View pattern and it will help minimize the complexity of the code.

Dapper is not a database specific package. It can be used with any database (SQL Server,MySQL, MS Access etc). It uses a IDbConnection for performing operations.

It does not replacing anything at all, a simple example will explain the concept.

Dapper Object List example

using Dapper;

class Group
  {
       public int ID { get; set; }
       public string g_name { get; set; }
       
       public double g_dr_loc { get; set; }
       public static List<Group> GetAll()
      {
           using (IDbConnection db = new System.Data.OleDb.OleDbConnection(System.Configuration.ConfigurationManager.ConnectionStrings["cstring"].ConnectionString))
          {
               return db.Query<Group>("select id,g_name from groups").ToList();
          }
      }

  }

//calling
var groups=Group.GetAll()

Here in the example, the Group model’s GetAll() static method will query all the rows into List of Group(model) using the Dapper. Without dapper you have to use Linq or a loop to store the row as a list of objects.

You can see how Linq can be used to achieve this in the following posts

Linq – suming rows,create list of custom fields,create model class object list from data table - Linq - suming rows,create list of custom fieds,create model class list from data table