Task with parameters in C#

Async Task with Parameters


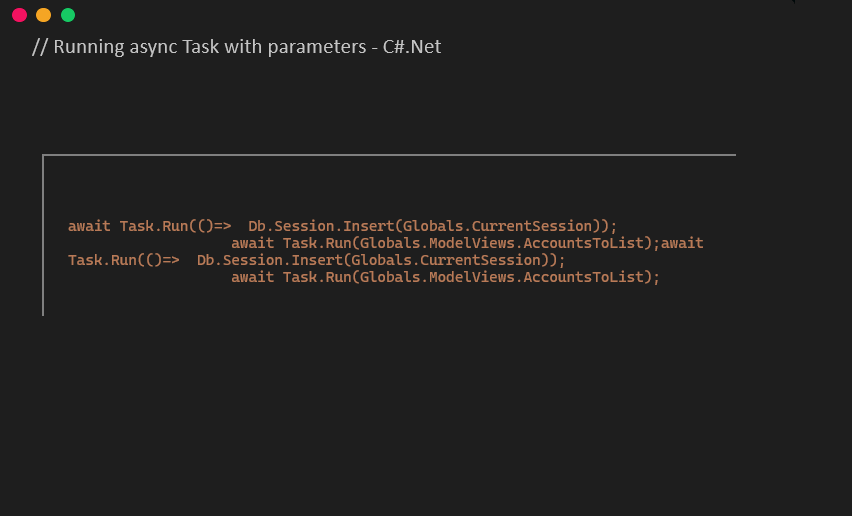
The following quick example shows how you can run a Task with argument.

 await Task.Run(()=>  Db.Session.Insert(Globals.CurrentSession));
 await Task.Run(Globals.ModelViews.AccountsToList);

C#.Net Database setup guides

How to setup MariaDB, SQLite and MySQL on C#.Net


I found the following guide useful for setup databases for projects (.Net). This includes the setup guides for MySQL, MariaDB and SQLite connections , can be used with MVC and Repository pattern and Dapper ORM

Dapper OLEDB Date value error in C#

How to fix Dapper [OLEDB] Date value error ‘Data type mismatch in criteria expression’ in C#


Dapper is a Micro ORM which help you to manipulate Database using Model class in C#.Net.

When you trying to Insert date value in Microsoft Access table using Dapper Execute method, will throw an error something like this.

System.Data.OleDb.OleDbException: ‘Data type mismatch in criteria expression.’

Dapper C#.Net

This will clearly shows the reason, the date insertion format is not correct. In SQL version of Dapper usage we may not see this error.

To solve this error simply turn the date value to proper string format. A sample usage is given below.

 var sql = "insert into expenses (acid,amount,edate) values (@acid,@amount,@edate);";
                
var id = conn.Execute(sql, new { acid = expense.Acid,amount = expense.Amount,edate = expense.Edate.ToShortDateString()});

More on Dapper

Dapper OLEDB Insert Error

How to fix Dapper [OLEDB] error ‘Characters found after end of SQL statement’ in C#


Dapper is a Micro ORM which help you to manipulate Database using Model class in C#.Net.

When you trying to Insert (using Dapper.Contrib.Extensions) Microsoft Access table using Dapper , you may end up with the following error

‘Characters found after end of SQL statement.’

Dapper C#.Net

This is due to Access doesn’t allow multiple statements to be executed same time. Only solution to this problem switch to the Dapper Execution method provided by Dapper library as follows.

 var sql = "insert into expenses (acid,amount) values (@acid,@amount);";
                
var id = conn.Execute(sql, new { acid = expense.Acid,amount = expense.Amount});

More on Dapper

Categorize user control properties in C#

How to categorize properties in C# user control Library.


User controls allow developers combine existing controls into a new control, with additional properties and features. It also helps to reduce the code size.

How to organize properties into a category

Categorizing properties allow developers to grouping a set of properties in C# User control. It is possible with a array Object syntax.

Place the statement just above the property function as follows

 [Category("Custom Properies")]     

Here Custom Properties is the category name.

 [Category("Custom Properies")]
        public HorizontalAlignment TextAlign
        {
            get => textBox1.TextAlign;
            set
            {
                textBox1.TextAlign = value;
                this.Invalidate();
            }
        }
         

I hope you understand the concepts and the following post may help you learn more about user controls

Add properties to user control in C#

How to add properties to user control Library in C#.Net


User controls allow developers combine existing controls into a new control, with additional properties and features. It also helps to reduce the code size.

How to add properties

There are two types properties, existing one and new. The existing properties can be overridden in user control as follows.

 public override Color BackColor
        {
            get { return base.BackColor; }
            set
            {
                base.BackColor = value;
                textBox1.BackColor = value;
            }
        }

Here we had BackColor property (by default), and wanna override with new one.

We can also create new property with a regular setter and getter function.

 public HorizontalAlignment TextAlign
        {
            get => textBox1.TextAlign;
            set
            {
                textBox1.TextAlign = value;
                this.Invalidate();
            }
        }

I hope you understand the concepts and the following post may help you learn more.

How to draw a line below textbox using Pen in C#

How to decorate Text box with custom Line in C# using Graphics and Pen classes.


Decorating a text box will be easy with Graphic class in C#.net . Suppose you wanna create a custom control and like to draw a custom Line , all you need to do is override the paint method and add the following code.

 private Color borderColor = Color.Salmon;
 private int borderSize = 2; 
protected override void OnPaint(PaintEventArgs e)
        {
            base.OnPaint(e);
            Graphics graph = e.Graphics;
            //Draw border
            using (Pen penBorder = new Pen(borderColor, borderSize))
            {
                penBorder.Alignment = System.Drawing.Drawing2D.PenAlignment.Inset;
    graph.DrawLine(penBorder, 0, this.Height - 1, this.Width, this.Height - 1);
            }
        }

I hope the code snippet helps you and the following will also do the same

How to draw a rectangle around textbox in C#

How to draw rectangle around a Text box in C# using Graphics and Pen classes.


Decorating a text box will be easy with Graphic class in C#.net . Suppose you wanna create a custom control and like to draw a rectangle around it, override the paint method and add the following code.

 private Color borderColor = Color.Salmon;
 private int borderSize = 2; 
protected override void OnPaint(PaintEventArgs e)
        {
            base.OnPaint(e);
            Graphics graph = e.Graphics;
            //Draw border
            using (Pen penBorder = new Pen(borderColor, borderSize))
            {
                penBorder.Alignment = System.Drawing.Drawing2D.PenAlignment.Inset;
 graph.DrawRectangle(penBorder, 0, 0, this.Width - 0.5F, this.Height - 0.5F);
            }
        }

Using the Graphics and Pen classes it will be easier to finish the Task.

I hope the code snippet helps you and the following will also do the same

How to insert Rows in .Net using Dapper ORM

How to use dapper ORM to insert rows in a .Net project.


Dapper is a micro ORM which make database operation simple using Models. It has capability to handle all type of databases.

How to use latest dapper ORM version with .Net project ?

Dapper require .Net Framework 4.7.2 or latter. Make sure the visual studio project support the Dapper or you can change the target Frame Work.

Open the Nuget manager and browse dapper and install the dapper and associated contrib extension.

Inserting Rows using Model

We can use dapper by importing the Dapper library as follows in module.

using Dapper;
 

To insert we have to prepare the Model and use IDbConnection to invoke the insert command. Again we have two choice a single row or list of row using a list objects.

 using (SqlConnection con = connection._GetConnection())
                    {
                        long rec = con.Insert(Salary);
                        
                        con.Close();
                     
                    }

Here _GetConnection() is a function that return a IDbConnection object and Salary is a regular C# class with table columns and getters and setters.

//Salary 
class Salary{
public int id {get;set;}
public double slary {get;set;}
}

How to use dapper in .Net project

How to use dapper ORM in .Net projects


Dapper is a micro ORM which make database operation simple using Models. It has capability to handle all type of databases.

The real charm of dapper is when you are working ModelView pattern., l leave that topic for another post.

How to use latest dapper ORM version with .Net project ?

Dapper require .Net Framework 4.7.2 or latter. Make sure the visual studio project support the Dapper or you can change the target Frame Work.

Open the Nuget manager and browse dapper and install the dapper and associated contrib extension.

Usage

We can use dapper by importing the Dapper library as follows

using Dapper;
....
var sql ="select * from emp order by id";
using (SqlConnection con = <sql connection>)
{
  con.QueryFirst<Models.Employee>(sql);
                        
}

The above example is based on C#.Net. This will return a list of Employee objects, which will be very useful for binding to a datagridview or a Combo control.