Create a TinyMCE Rich Text Editor in React

How to create Editor in React using TinyMCE library


So far we have seen many Editor Frameworks and their usage guides.

May be the simplest of all Editor libraries for React is TinyMCE.

Let’s quickly setup a React project and install the Tiny dependencies.

npx create-react-app myapp
yarn add @tinymce/tinymce-react

Make sure all the dependencies and peer dependencies properly added. Using the Editor component we can setup the editor, similar to draft-js.

import { Editor } from "@tinymce/tinymce-react";

const TinyMceEditor = () => {
  return (
    <Editor
      initialValue="<p>This is the initial content of the editor.</p>"
      init={{
        height: 500,
        menubar: false,
        plugins: [
          "advlist autolink lists link image charmap print preview anchor",
          "searchreplace visualblocks code fullscreen",
          "insertdatetime media table paste code help wordcount"
        ],
        toolbar:
          "undo redo | formatselect | " +
          "bold italic backcolor | alignleft aligncenter " +
          "alignright alignjustify | bullist numlist outdent indent | " +
          "removeformat | help",
        content_style:
          "body { font-family:Helvetica,Arial,sans-serif; font-size:14px }"
      }}
    />
  );
};

export default TinyMceEditor;

The configuration was quick, and it is easier to use.

Open the example in Sandbox.

Create a Slate Rich Text Editor in React

How to create Editor in React using Slatejs


So far we have seen many Editor Frameworks and their usage guides. Slatejs is a good alternative for Draft-js and it is in beta mode for a long time.

Let’s quickly setup a React project and install the slate dependencies.

npx create-react-app myapp
yarn add slate slate-react

Make sure all the dependencies and peer dependencies properly added.

import React, { useMemo, useState } from "react";
import { createEditor } from "slate";
import { Slate, Editable, withReact } from "slate-react";

const SlateEditor = () => {
  const editor = useMemo(() => withReact(createEditor()), []);
  const initialValue = [
    {
      type: "paragraph",
      children: [{ text: "A line of text in a paragraph." }]
    }
  ];
  const [value, setValue] = useState(initialValue);

  return (
    <Slate editor={editor} value={value} onChange={setValue}>
      <Editable />
    </Slate>
  );
};

export default SlateEditor;

Open the example in Sandbox.

Create a Material-UI Rich Text Editor in React

How to create Material UI Editor in React


So far we have seen many Editor Frameworks and their usage guides. As a React fan you may miss the MUI library. The mui-rte is Material UI RichText editor and viewer.

The editor was built on top of draft-js and supports use defined blocks, styles, autocomplete strategies, async/sync custom atomic blocks, callbacks, and decorators as well as toolbar and theme customization to enhance the editor to all needs.

Let’s quickly setup a React project and install the dependencies.

npx create-react-app myapp
yarn add mui-rte @mui/material @mui/icons-material @mui/styles @emotion/react @emotion/styled 

Make sure all the dependencies and peer dependencies properly added.

import { createTheme, ThemeProvider } from "@mui/material/styles";
import MUIRichTextEditor from "mui-rte";

const MuiEditor = () => {
  const save = (data) => {
    console.log(data);
  };
  const myTheme = createTheme({
    // Set up your custom MUI theme here
  });

  return (
    <div className="editorContainer">
      <ThemeProvider theme={myTheme}>
        <MUIRichTextEditor
          label="Type something here..."
          onSave={save}
          inlineToolbar={true}
        />
      </ThemeProvider>
    </div>
  );
};

export default MuiEditor;

Open the example in Sandbox.

Create a smart layouting system for Vue3 app

How to apply layouts dynamically at router level in Vue 3


Layouting in Vue is nothing but another use of reusable components. Different pages require different elements (UI), such as navigation, menu etc. Some of them are repeated in each page, like router links / page links.

We can create layout for such components and wrap child with the layout. Can I apply it at the router level ?. A dynamic layout / router level layout will serve the needs.

Dynamic AppLayout

The concept is not new, create layout constructor and apply layout based on the route change. First up all create folder named layouts and Applayout.vue file.

This example uses Vue 3 setup

<template>
  <component :is="layout">
    <slot />
  </component>
</template>

<script>
import AppLayoutDefault from './AppLayoutDefault'
export default {
  name: "AppLayout",
  data: () => ({
    layout: AppLayoutDefault
  }),
  watch: {
    $route: {
      immediate: true,
      async handler(route) {
        try {
          const component = await import(`@/layouts/${route.meta.layout}.vue`)
          this.layout = component?.default || AppLayoutDefault
        } catch (e) {
          this.layout = AppLayoutDefault
        }
      }
    }
  }
}
</script>

This is a wrapping component which will check the route meta layout and apply dynamically. We can use this component at App.vue as follows.

<template>
  <div id="app">
    <AppLayout>
		<router-view />
	</AppLayout>
  </div>
</template>

<script>
import AppLayout from './layouts/AppLayout'
export default {
  name: 'App',
  components: { AppLayout }
}
</script>

Default Layout

We need a blank layout in case no layout is specified. In our layouts folder create AppLayoutDefault.vue with simple slot.

<template>
  <div>
    <slot />
  </div>
</template>

Other layouts

Let’s focus on Home layout AppLayoutHome.vue,

<template>
  <div>
    <header class="header" >Home Layout</header>	 
    <slot />
  </div>
</template>
<script>
 
export default {
  name: "AppLayoutHome", 
}
</script>
 

You can also create a LinkLayout for router Links too, I skipped it for simplicity.

Now our Layouting almost ready with two layout, a final configuration is required to work this setup.

Applying Layouts

In the router/index..vue locatte the router configuration and add out meta layout property as follows

 {
    path: '/',
    name: 'Home',
    component: Home,
	meta:{
		layout:'AppLayoutHome'
	}

That’s it we are not ready to go.

The complete source code of the project can be found at Vue3 Repo

VB6 : Adding a Grid control to Data Report


A summary in sales/purchase invoice a necessary for clarifying levied tax details or something like that. In VB6 Report allows you use limited controls only (Label, Textbox, Image control etc)

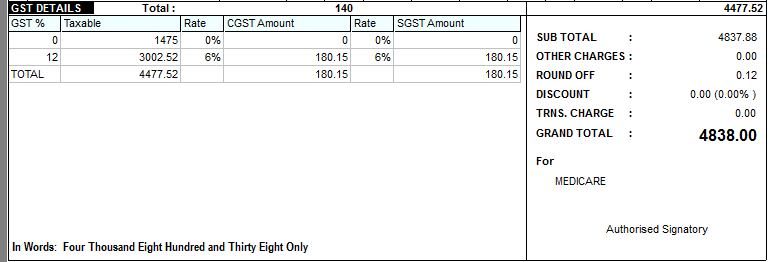
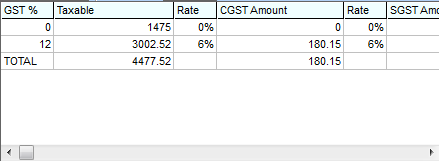
A grid view of summary as follows may add some beauty to your report, isn’t it?

salesprintgrid

As you know, you can’t  add a grid control to your Visual Basic 6.0 Data Report. So we need to alternate method. I suggest adding a screen picture of the grid instead of the using control, this can be quiet easy. Continue reading “VB6 : Adding a Grid control to Data Report”

VB6: List all printers using code in Windows


Listing all printers with name, Port in VB6 is simple as listing default printer port using Kernel32 library . Today we going show you how to do this.

As usual we start with function declaration, then define a new function which add all information into a list box. Here we goes

Kernel32 GetProfileString method

Declare Function GetProfileString Lib “kernel32.dll” Alias “GetProfileStringA” (ByVal lpAppName As String, ByVal lpKeyName As String, ByVal lpDefault As String, ByVal lpReturnedString As String, ByVal nSize As Long) As Long

Add printer information into a list box

Public Sub GetPrinterList(lstPrinter As ListBox)Dim PrintData As PrinterDim defprinterpos%

For Each PrintData In Printers

‘ Add printer name and port to list

lstPrinter.AddItem PrintData.DeviceName & ” at: ” & PrintData.Port

‘ Check for default printer

If PrintData.DeviceName = Printer.DeviceName Then defprinterpos = lstPrinter.NewIndex

Next

lstPrinter.ListIndex = defprinterpos%

End Sub

This sub procedure will take list box as argument, and add printer to this list box.

Call the sub

The final line of code just invoke the procedure and see what we have.

Happy coding

List All the Table Names in VB Net

How to List all data tables from a access .accdb file in VB.net using the ‘GetSchema’ Method. This tutorial is quick access to the problem.


How to List all data tables from a access .accdb file in VB.net using the ‘GetSchema’ Method. This tutorial is quick access to the problem.

Add new fields to Access table using VB6


Let me show how to add a new field into an existing access database using Visual Basic 6.0.Using the tableDef and Filed object you can create new fields. Firstly, you need to create Database and Recordset object, mke sure the DAO access object library. Continue reading “Add new fields to Access table using VB6”

How to auto complete text box in VB6


How to add a auto complete feature in Microsoft Visual Basic 6 ?

With the help of some creepy code, we can save the entry into a data file temporarily and later we can use them as input for auto complete the name/place/text.

The code is work with Text box as well as Combo box. Drop the following code to a module call the methods defined. Continue reading “How to auto complete text box in VB6”