How to develop Mac App using SwiftUI

How to develop a Mac App using Swift Programming Language


When it comes to Mac app development, Swift has become the go-to language for many developers. Its modern syntax and powerful features make it an excellent choice for creating robust and highly efficient applications for the Mac platform.

To get started with Mac app development using Swift, you’ll need Xcode, Apple’s integrated development environment, which provides all the necessary tools and resources. Xcode is available for free on the Mac App Store.

Once you have Xcode installed, you can create a new project and choose the “Mac App” template. This will set up the basic structure of your app and provide you with a starting point. From there, you can begin writing your Swift code to add functionality and customize the user interface.

One of the advantages of using Swift for Mac app development is the seamless integration with Apple’s frameworks and APIs. This allows you to leverage the full power of the Mac ecosystem, accessing features such as Core Data for data persistence, and Core Animation for smooth and visually appealing user interfaces.

Furthermore, Swift offers strong type safety and error handling, making your code more robust and reliable. Its performance is also impressive, as Swift is designed to be fast and efficient, ensuring a smooth experience for users.

Additionally, Apple provides extensive documentation and resources for Swift and Mac app development. The official Swift documentation, along with tutorials and sample projects, can be found on Apple’s developer website, providing you with invaluable guidance and support throughout your development journey.

In conclusion, Swift is a fantastic choice for developing Mac apps, offering a modern and expressive language that is highly compatible with the Apple ecosystem. With the right tools and resources, you’ll be well on your way to creating amazing applications for the Mac platform.

Here’s an example of code for a Swift app for macOS:

import Cocoa

class AppDelegate: NSObject, NSApplicationDelegate {

    lazy var window: NSWindow = {
        let window = NSWindow(contentRect: NSRect(x: 0, y: 0, width: 400, height: 300),
                              styleMask: [.titled, .closable, .miniaturizable, .resizable],
                              backing: .buffered,
                              defer: false)
        window.center()
        window.contentView = NSHostingView(rootView: ContentView())
        return window
    }()

    func applicationDidFinishLaunching(_ aNotification: Notification) {
        window.makeKeyAndOrderFront(nil)
    }

    func applicationWillTerminate(_ aNotification: Notification) {
        // Insert code here to tear down your application
    }
}

struct ContentView: View {
    var body: some View {
        VStack {
            Text("Hello, SwiftUI on macOS!")
                .font(.title)
                .padding()
        }
        .frame(maxWidth: .infinity, maxHeight: .infinity)
    }
}

// Launch the application
let app = NSApplication.shared
let delegate = AppDelegate()
app.delegate = delegate
_ = NSApplicationMain(CommandLine.argc, CommandLine.unsafeArgv)

This is a basic Swift application for macOS that utilizes SwiftUI for the user interface. The AppDelegate class sets up a window with a specified size, style, and content view. In this example, the content view is defined by the ContentView struct, which displays a simple “Hello, SwiftUI on macOS!” text using a SwiftUI Text view. The app is launched by creating an instance of NSApplication and assigning the AppDelegate as its delegate.

What is swift data ?

What is swift data ?


Swiftdata is a powerful data processing software designed to streamline and optimize your data management needs. With its innovative features and user-friendly interface, Swiftdata empowers businesses to efficiently gather, organize, analyze, and utilize data in the most effective way possible.

Featuring cutting-edge technology, Swiftdata allows you to seamlessly integrate data from various sources, whether it’s transactional databases, spreadsheets, or even IoT devices. Its robust data integration capabilities enable you to consolidate and harmonize disparate data sets, ensuring accuracy and consistency across your organization.

Thanks to Swiftdata’s advanced data processing capabilities, you can effortlessly perform complex data transformations, calculations, and aggregations. Whether you need to generate insightful reports, create predictive models, or extract meaningful patterns from your data, Swiftdata has got you covered.

Moreover, Swiftdata offers a highly scalable and parallelized computing framework, allowing you to handle massive volumes of data without compromising performance. Its distributed architecture ensures fast processing speed and optimal resource utilization, enabling you to tackle big data challenges with ease.

With Swiftdata, data governance and security are at the forefront. You have full control over access rights, data privacy, and compliance, ensuring that sensitive information is protected and only accessible to authorized personnel.

In conclusion, Swiftdata is an all-in-one solution for data management, processing, and analysis. It empowers businesses of all sizes to unlock the true potential of their data, make data-driven decisions, and stay ahead in today’s competitive landscape. Explore the possibilities with Swiftdata and witness the transformation of your data into actionable insights.

Swift Component Preview

How to preview SwiftUI component


What is SwiftUI ?

SwiftUI is a modern framework by Apple for creating user interfaces on iOS, macOS, watchOS, and tvOS. It uses a declarative syntax and provides powerful features for building interactive and responsive interfaces. With SwiftUI, developers can create stunning user interfaces using minimal code and take advantage of automatic UI updates when data changes. It seamlessly integrates with other Apple frameworks, making it a popular choice for app development.

SwiftUI Preview

SwiftUI provides a powerful way to create user interfaces for your iOS, macOS, watchOS, and tvOS apps. With SwiftUI, you can build modern, responsive, and dynamic interfaces using a declarative syntax, making it easier than ever to bring your app ideas to life.

One of the standout features of SwiftUI is its built-in preview functionality. Preview allows you to see how your interface will look and behave in real-time, without the need to build and run your entire app. This saves you time and provides instant feedback as you design and develop your user interface.

To use SwiftUI Preview, simply open your SwiftUI code file and look for the preview canvas on the right-hand side of Xcode. The canvas dynamically updates as you make changes to your code, allowing you to see the effects of your modifications instantly.

The preview canvas not only displays how your interface looks, but it also supports interaction. You can interact with your interface directly on the canvas, allowing you to test user interactions and observe how your UI responds to various user inputs.

With SwiftUI Preview, you can also explore different device types and orientations to see how your app adapts to different screen sizes. This helps ensure that your app looks great and functions properly across a wide range of devices.

Additionally, SwiftUI Preview allows you to test your app’s dark mode and localization settings, giving you the ability to view your interface in different contexts without having to run the app on a physical device or simulator.

In conclusion, SwiftUI Preview is an invaluable tool for any SwiftUI developer. It enables you to quickly iterate on your user interfaces, visualize changes in real-time, and ensure a seamless user experience across different devices and configurations. So start harnessing the power of SwiftUI Preview today and take your app development to the next level! .

How to preview components in SwiftUI.

When working with SwiftUI, you can preview your components directly in Xcode’s canvas without the need to run the entire app. This feature is incredibly helpful for visualizing and testing your UI designs in real-time.

To preview a component in SwiftUI, you need to create a new struct that conforms to the PreviewProvider protocol. This struct will contain a static var previews property, which returns an array of PreviewProvider instances.

Inside previews, you can call the PreviewProvider initializer, passing in an instance of your component and any necessary modifiers. This will generate a live preview of your component in the canvas.

Here’s a simple example to illustrate the process:

import SwiftUI

struct MyComponent: View {
    var body: some View {
        Text("Hello, SwiftUI!")
            .font(.title)
            .foregroundColor(.blue)
    }
}

struct MyComponent_Previews: PreviewProvider {
    static var previews: some View {
        MyComponent()
    }
}

In this example, we have a MyComponent struct that displays a text with a blue color and a title font. The MyComponent_Previews struct serves as the preview provider for MyComponent.

With these components set up, you can now see the live preview in the canvas. Simply open the assistant editor in Xcode, select the preview provider struct from the rightmost dropdown menu in the canvas toolbar, and enjoy the live rendering of your SwiftUI component.

Keep in mind that you can customize the preview by adding multiple instances of the component and modifying their properties to simulate different scenarios. This allows you to test how your component responds to various data inputs and dynamic changes.

I hope this explanation helps you better understand how to preview components in SwiftUI. If you have any further questions, feel free to ask!

How to use MSSQL Server on ARM based Mac.

How to use MSSQL Server on ARM based Mac M1,M2


Microsoft SQL Server can be run on Linux, Windows but they may not work with Apple Mac/Mac mini. We can’t change a just DBMS for new OS, different platform .

The fact that Mac/Mac mini with M2 chip is ideal for Multi platform development. It is better alternative for Windows Machine, since you are looking for a desktop.

We have two options to consider for getting things work, a Virtual machine dedicated to MSSQL or just containerise the SQL server which is a better choice.

VM don’t like Mac, I tried Virtual Box and Parallel. VB didn’t start up correctly. In case Parallel it didn’t get installed.

So we move to the Docker option. Most of the docker images (ARM based MSSQL) designed for Intel Mac ? For Mac with M1 and M2 (Apple Silicon).

Wee needs to user Rosetta for the transition from Intel to New M1/M2. It work behind the seen.

For complete Guide on Containerising MSSQL Server visit this Post.

Create Docker Container for MSSQL on Mac


As the first step we need to install Docker Mac and make sure you have Rosetta get installed, in case of using Mac with M1 or M2. These Models come with Apple Silicon. Some of the older apps come with Intel chip support, Rosetta will help you the migrate to Apple Silicon.

Docker Compose

Using the Docker-Compose we can containerise MSSQL. Here is the working Docker-Compose file.

Create a Folder called MSSQL and add Docker-Compose.yml file with following contents

version: '3.9'

services:
  mssql-azur-edge:
    image: mcr.microsoft.com/azure-sql-edge 
    platform: linux/arm64
    ports:
      - 1433:1433
    volumes:
      - ~/apps/mssql/data:/var/lib/mssqlql/data
    environment:
      - ACCEPT_EULA=Y
      - SA_PASSWORD=mssql1Ipw

Since I’am using the Mac Min M2, which is an arm device, should specify in the platform key. Port key expose the internal port to external. Volume indicate the storage location which is optional.

In the environment key we can pass the Password for SQL Server etc.

Now . Run the Docker-compose up -d. for running the Container. If there is any problem , run this command for the log docker-compose logs

You are ready to use the sever. You can also use the Mac IP and exposed port in SQL Management studio or in a connection string as (source)

 Mac IP, 1433

Access Docker MSSQL Container from Parallel (Mac Mini M2)

How to access Docker Contained DB from Parallel.


Docker not working with Windows 11 in Parallels. Is there any way to use MSSQL with Parallel ? Yes.

Using the Mac Network IP and container exposed port number, we can access the server (Docker) within MSQL Management Studio or in a connection strings, separated by a single comma

Where Did I get the IP ?

In System Settings – Network- Find the IP.

connectionString="Data Source=192.168.20.100,1433;Password=mssql1Ipw;User Id=sa;Initial Catalog=dolphinedb;Integrated Security=False" />

The above code is sample sql connection string. Thanks for Docker.

Mac Mini M2 for Windows Developers

Moving from Windows to Mac


I got Mac Mini M2 last Saturday, wow. I love the Machine it saved my Desk. It is the base Model , with 8GB ,250 GB SSD.

I would like to share some of my experiences With M2. It is incredibly fast.

Running Windows 11 with Parallel VM

I’am using Parallels 8.0.1 , successfully configured windows 11 and installed Microsoft Visual Studio and it work without any trouble. Parallels allow me switch between Windows Apps and Mac Apps with ease and peace.

I did find some kinda of hanging and black out while the Mac went to sleep and wake from sleep.

Following Not working for me – Parallels

MSSQL Server

Docker

Above mentioned Apps can’t run on VM. So I decided to run it from Docker container which is on the Mac.

Apple Silicon and Docker

Some of the Docker Images not working with M2, it could be designed for Intel chip. So we need Rosetta for using such Docker images.

Installing Rosetta

Rosetta is referred as translater for Intel Mac Apps. You need not worry about any thing at all. Just install and move on.

 softwareupdate --install-rosetta

For more guides on Rosetta please visit MacHow

If you are a developer looking for Work Station with Multiple Display capabilities. Don’t wait to grab the deal today.

Task with parameters in C#

Async Task with Parameters


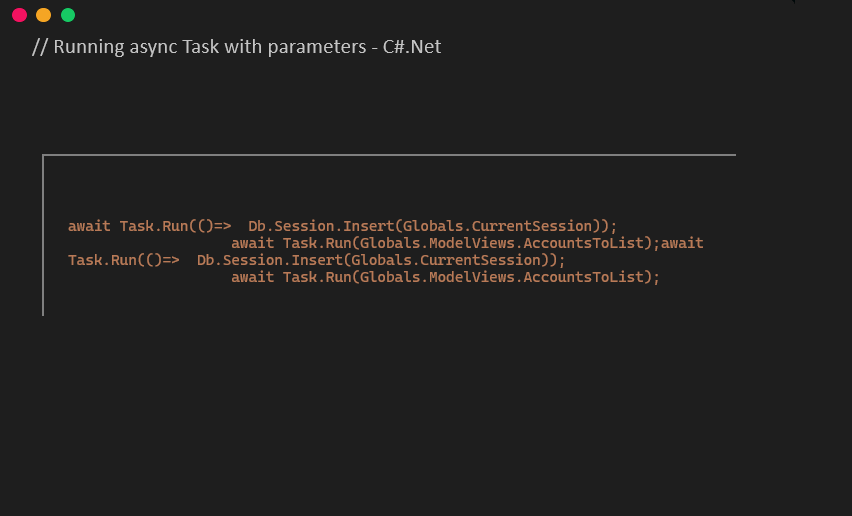
The following quick example shows how you can run a Task with argument.

 await Task.Run(()=>  Db.Session.Insert(Globals.CurrentSession));
 await Task.Run(Globals.ModelViews.AccountsToList);

How to load an image in Keras from url ?

How to load an image in Keras for machine learning from a url for image classification


How to load an image in Keras for machine learning from a url ?

For loading image in Keras we used to write code like this

img = keras.utils.load_img(path="OIP.jpg",
color_mode = "grayscale",target_size=(28,28,1))

How about using a image URL instead of the above code?

Need to perform couple of things.

  1. Get response from the image url.
  2. Get the image as byte using ByteIO
  3. Covert the image as Grayscale for prediction and apply appropriate resize.
  4. Finally covert the image into a NumPy array.

Let’s wrap all these in a function.

from tensorflow import keras
from io import BytesIO
from PIL import Image
import requests

def loadImage(url):
    response = requests.get(url)
    img_bytes = BytesIO(response.content)
    img = Image.open(img_bytes)
    img = img.convert('L')
 
    img = img.resize((28, 28), Image.NEAREST)
    img = keras.utils.img_to_array(img)

    return img

before using the image for prediction, we need to reshape the image.

url = 'https://edwin-de-jong.github.io/blog/mnist-sequence-data/fig/5.png'
img = loadImage(url)
test_img = img.reshape((1, 784))
img_class = model.predict(test_img)

ML/AI Posts, you may interested.

Get predicted class in Keras Sequential Model

Get predicted class in Keras Sequential Model


 In Keras Sequential Model problems we can get predicted result as output. As a beginner you may note that it is not what you expected.

So how do we get the actual label for that image.?

In image classification we get a predicted result which is pointed to corresponding label. 

In such a case use the NumPy’s argmax function.

img_class = model.predict(test_img)
prediction = img_class[0]
className = np.argmax(prediction, axis=-1)
print("Class : ",className)